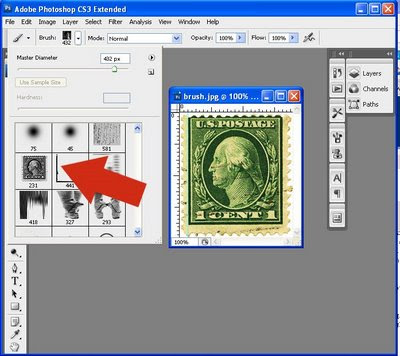
First of all, let me explain that the type of Photoshop brush that I like to use actually behaves much more like a rubber stamp. So, the first step is to find an image that I like and want to be able to use repeatedly in my artwork, without having to continually find and open the file.. I'll use the postage stamp from Friday's freebie for my example.
After you've selected the image, you want to crop it and clean up any extraneous marks or discolorations.

then you'll go to Edit>Define Brush Preset. You'll need to choose a name, and then save. Now that brush will show up in your brush list, so that you can choose that image and use it in what ever color you want.

Feel free to make this postage stamp a brush for yourself! Just 1) click on it, 2) right-click on the resulting image and choose "Copy image", 3) open a new document in PS (Photoshop will open a new image that's exactly the size of the image you just copied to the clipboard--how cool is that?), 4) Paste the image into the document, 5) go to Edit>Define Brush Preset.
Done!
I'll be posting some of the PS brushes I've created for you later this week--LMK if you have any questions!

3 comments:
OMG, thank you so much! I use PSP instead of Photoshop but you just gave me some amazing info that I'd never have thought to use until now. My eternal gratitude...I thank you and my future art pieces thank you, too. lol
Peace & Love,
~Barb~
Interesting. I so want to invest in Photoshop one day. I have Photoshop Element now and find that a challenge to use yet. SO guess I should get my feet wet learning it before making the huge investment in the other.
Thank you sooooo much for doing this. I've been trying to learn about Photoshop and much of it is a mystery to me. Tutorials like this are a huge help.
Post a Comment